Bluesky Profile Picture Guide 2026: Circle Crop That Reads
Crop a clear Bluesky profile picture: square source, circular safe zone, PNG/JPG export, and a file under the real 1 MB avatar cap.

Contents
- Best Bluesky Profile Picture Size
- Native Square Crop First
- Circle Safe Zone for Faces and Logos
- RoundCut Crop and Export
- File Format and File Weight
- Troubleshooting Blurry or Clipped Avatars
- Bluesky Profile Picture FAQ
- What size should a Bluesky profile picture be?
- Does Bluesky crop profile pictures into a circle?
- Should a Bluesky avatar be PNG or JPG?
- Why does my Bluesky avatar look blurry?
- Can I use the same avatar on Bluesky and other platforms?
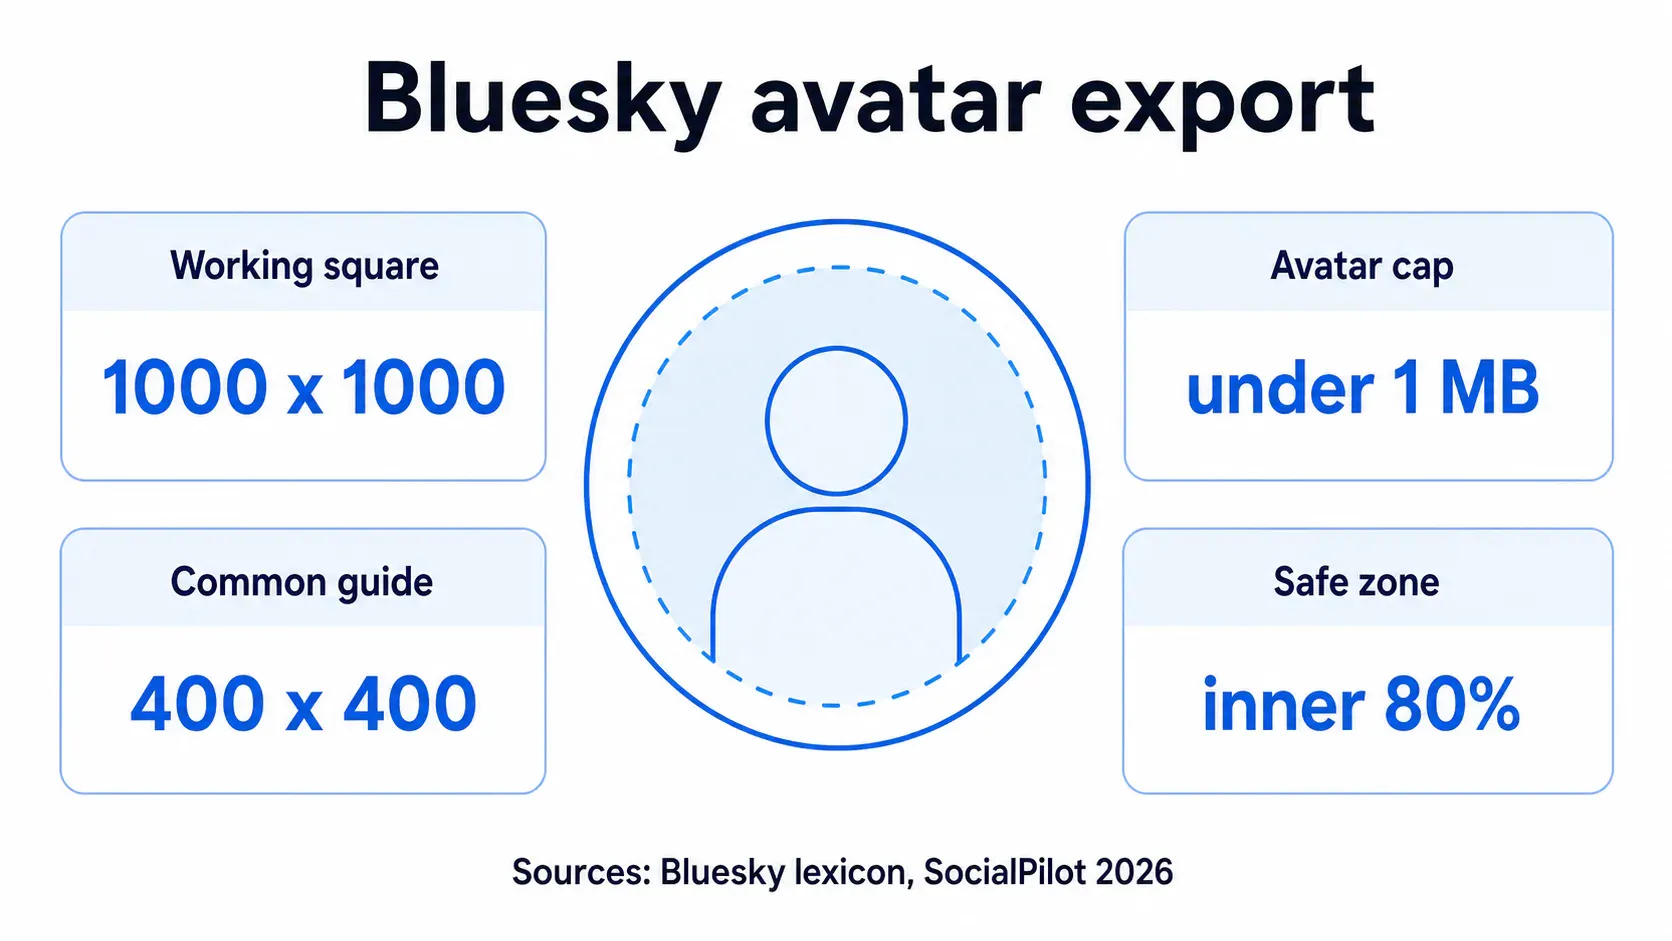
Use a square image for your Bluesky profile picture, keep the face or logo inside the inner 80% of the circle, and export PNG or JPG under 1 MB. A 400 x 400 file matches common 2026 size guides; I prefer a 1000 x 1000 working square when the source is clean, then resize or compress before upload.
Best Bluesky Profile Picture Size
The practical Bluesky profile picture size is a square crop, with 400 x 400 as the common published recommendation and 1000 x 1000 as a safer working file when your source photo is sharp. Don’t treat it like a post image. The avatar has its own profile-file rules.
Most current size guides point to 400 x 400 pixels for a Bluesky profile picture, and SocialPilot’s 2026 roundup says the profile picture displays in a circular frame. It is a useful baseline, but it misses the part that matters when you are cropping a face, a logo, or a tiny creator mark: the square is only the container. The visible shape is the circle (where corners stop counting).
The stronger source is the Bluesky profile lexicon. It defines the avatar as a small image displayed next to posts, accepts PNG and JPEG, and sets maxSize to 1000000 bytes. That byte cap is the hard production constraint. If a guide tells you only “400 x 400,” it is giving you the grid, not the export decision.
Here is the working target I would use:
| Use case | Working square | Final export | Format |
|---|---|---|---|
| Face photo | 1000 x 1000 if available | 400 x 400 or larger under 1 MB | JPG |
| Flat logo | 1000 x 1000 if available | 400 x 400 or larger under 1 MB | PNG |
| Transparent logo edge | 1000 x 1000 if available | PNG under 1 MB | PNG |
| Tiny source screenshot | Don’t upscale unless necessary | Re-crop from original if possible | JPG or PNG |
I would not upload a camera original just because Bluesky accepts it. A full phone crop has more pixels than the avatar needs, and the platform still has to make smaller versions for the feed. Do the boring export yourself.
Native Square Crop First
Start with the editor already on the device. On Android, Google Photos documents the path as opening the image, tapping Edit, choosing Crop, and using aspect ratio options such as a square. On iPhone, Photos has the same basic crop workflow. This is usually enough for a face photo.
The native route is fast because it does one job: turns a tall or wide original into a square. It also keeps you from uploading a full camera frame where your face sits too high, too low, or too close to one edge. That’s enough for many selfies.
The drawback is preview. Google Photos can make the square, but it will not show you the exact circular mask Bluesky applies in the feed, profile header, reply threads, and compact account lists. A square crop that feels balanced at full size can still lose a logo counter-form once the corners disappear. If your avatar is a mark, not a face, compare it against this logo version before you publish.
My native-first pass is simple:
- Open the original, not a screenshot from another app.
- Crop to 1:1.
- Center the face, logo, or symbol.
- Save a copy, not the only original.
- Check file weight before uploading.
That last step matters because Bluesky’s avatar cap is under 1 MB. A square crop can still be too heavy if it is a PNG with gradients, a busy background, or an unnecessarily large canvas.
Circle Safe Zone for Faces and Logos
Bluesky shows the avatar as a circle in the places people actually notice it: beside posts, replies, reposts, and follows. The easiest repeatable rule is to keep the essential part inside the inner 80% of the square. That leaves about 10% of throwaway margin on each side.
For headshots, the essential part is not the whole head. It is the eyes, eyebrows, nose, mouth, chin line, and enough hairline that the crop does not feel like a passport-photo accident. For logos, it is the mark’s outer shape, any internal whitespace, and the smallest counter-form that still needs to read at feed size. The shape can breathe. The text usually cannot.
This is the same safe-zone logic I use for a GitHub avatar, because the problem is geometric before it is platform-specific. A circle inscribed inside a square cuts away the corners. Anything important living near those corners is gone.
The same framing shows up in the Slack version, where a small avatar has to stay readable in sidebars and message lists. The math is boring; the crop still matters (especially beside dense text).
Use this framing rule:
- Face photo: eyes slightly above center, chin inside the inner ring, shoulders optional.
- Initials or monogram: letterforms inside the inner 80%, with extra whitespace around diagonal strokes.
- Round logo: center the logo, but do not let the logo touch the avatar circle.
- Wide wordmark: make a simplified symbol instead; full text will shrink into lint.
- Photo of an object: crop the object square first, then decide whether the circle helps or hurts.
My take: if the avatar is a brand mark, skip tiny text. A small “RC” style monogram beats a full company name once the avatar is reduced in the feed. The wordmark might look more complete in the cropper, but it’ll lose in the timeline.
RoundCut Crop and Export
Once the square is roughly right, use RoundCut when you need to see the circle before export. Open the circle crop tool, drop the square, adjust the subject against the circular mask, then export PNG for logos or JPG for most photos. The benefit is preview (the part native editors skip).
If you need that preview, use RoundCut Circle Crop and watch the edge before downloading. It gives you a round-mask preview for profile pictures, avatars, and logo marks, with PNG, WebP, and JPG export choices. For Bluesky, stick with PNG or JPG because the official profile avatar definition accepts PNG and JPEG.
There is one trade-off people miss: JPEG cannot keep transparent corners. RoundCut’s tool says JPEG uses a solid color background, which is fine for most headshots and bad for a transparent logo meant to float over different UI surfaces. If the edge transparency matters, export PNG and then check the file size.
For a file that is still too wide or too heavy, RoundCut Resize can bring the square down before export. Resizing before compression preserves more control than pushing a giant file through a harsh compression pass.
File Format and File Weight
Use JPG for photographic profile pictures and PNG for flat logos, icons, and transparent edges. The official profile avatar definition accepts PNG and JPEG, with a 1,000,000-byte cap. That makes WebP and SVG bad bets for the actual avatar upload, even if another social-size blog lists them.
This is where I disagree with the generic size-guide answer. A 400 x 400 JPG of a face is usually easy to keep under 1 MB. A 400 x 400 PNG logo with transparency may also be fine. But a detailed PNG made from a screenshot, a textured badge, or a gradient-heavy AI image can run heavy because PNG protects hard edges and transparency instead of throwing information away.
Use the format decision like this:
| Image type | Pick | Why |
|---|---|---|
| Headshot or selfie | JPG | Smaller file for photographic detail |
| Logo with transparent edge | PNG | Keeps alpha and clean geometry |
| Logo on solid color | PNG or JPG | PNG for crisp edges, JPG for smaller weight |
| Screenshot avatar | PNG first | Text and UI lines smear under rough JPG compression |
If the export lands over the cap, RoundCut Compress can shrink the finished crop after the framing is locked. Don’t compress first and crop later. That’s how hair, glasses, and logo edges get rough.
One more practical note: Bluesky post images have their own image rules. Don’t borrow a post-image size or file limit and apply it to the profile avatar. The avatar is a profile field, and its profile lexicon cap is the number to satisfy.
Troubleshooting Blurry or Clipped Avatars
Most Bluesky avatar failures fall into three buckets: the source was too small, the crop ignored the circle, or the export was heavy enough that the platform had to do extra work. You can fix all three before uploading.
If the avatar looks blurry, start by checking the source. A tiny screenshot from another profile will not become sharp because you saved it as a 1000 x 1000 square. Upscaling can soften blocky edges, but it cannot recover eyelash detail or logo curves that were never in the file. For platform-specific comparison, the same issue shows up in the Discord example when a server logo starts too small.
If the avatar clips your forehead, chin, or logo corners, the problem is framing. Reopen the square, zoom out slightly, and keep the must-read content inside the inner 80%. Check it at a small size, not only in the cropper. A profile picture lives in motion, beside text, inside a dense timeline.
If the file uploads but looks softened afterward, export smaller and cleaner. For a face, try a JPG square around the common 400 x 400 target and keep it comfortably under the 1 MB profile cap. For a logo, use PNG, but remove unnecessary transparent padding and flatten gradients that do not survive tiny display.
The best cross-platform habit is to keep one master square and derive each platform from it. If you are already maintaining LinkedIn, Slack, GitHub, and Bluesky avatars, the LinkedIn version uses the same safe-zone idea.
This YouTube guide shows the same issue at a larger profile scale. Different platform, same crop discipline.
Bluesky Profile Picture FAQ
What size should a Bluesky profile picture be?
Use a square image. The common 2026 guide recommendation is 400 x 400 pixels, but I prefer preparing a clean 1000 x 1000 working square when the source has enough detail, then exporting under Bluesky’s 1 MB avatar cap.
Does Bluesky crop profile pictures into a circle?
Yes, current size guides describe Bluesky profile pictures as circular in display, and the UI shows avatars as circles beside posts and profile elements. Design the square for the circle, not for the full corner-to-corner canvas.
Should a Bluesky avatar be PNG or JPG?
Use JPG for normal face photos and PNG for logos, icons, screenshots, or transparent edges. The official profile avatar definition accepts PNG and JPEG. I would not use SVG or WebP for the profile avatar unless Bluesky’s official profile definition changes.
Why does my Bluesky avatar look blurry?
The usual cause is a weak source file, a too-tight crop, or a heavy upload that gets recompressed. Start from the original photo or logo, crop a square, keep the key subject inside the inner 80%, and export under 1 MB.
Can I use the same avatar on Bluesky and other platforms?
Yes, if you keep a master square and export platform-specific copies. For profile images, consistency matters more than squeezing every pixel into the frame. Keep the face or mark centered, leave margin for the circular mask, and adjust file format per platform.
For the least fussy result, make the source square, preview the circle, and export the final file under 1 MB. If a logo only works when it fills the whole square, it is not an avatar yet. Simplify the mark before you upload.


