Washed-Out Photo Colors After Upload: the Missing Tag
Photo colors look washed out after upload because the color profile got dropped, not because of compression. Measured: how far each color moves, and the fix.

Contents
Your photo didn’t lose color on the way up. It was written in a wide-gamut space, something dropped the profile along the way, and the same numbers now describe a smaller color. I measured the gap on seven ordinary subject colors: six moved by ΔE00 2.13 to 4.38, and only the neutral grey stayed put. Converting to sRGB before you upload closes most of it.
Same numbers, a different meaning
A wide-gamut photo and an sRGB photo can carry the identical byte 217 in the red channel. Display P3, the encoding Apple registered with the International Color Consortium, uses the same D65 white point and the same transfer curve as sRGB. Only the primaries move: its red corner sits at x 0.68, y 0.32, further out than the sRGB one. So 217 in a P3 file is a deeper red than 217 in an sRGB file, and the number alone never says which you meant.
The embedded profile says it. Strip that profile and the CSS Color specification tells every browser exactly what to do with what’s left: “colors specified in HTML, and untagged images must be treated as being in the sRGB color space unless otherwise specified.” Nothing malfunctioned. A viewer followed the rule on a file that stopped declaring itself, and Apple’s own color-management technote makes the same point from the other side, calling untagged pixel data “considered undefined”.
Neutrals give you the tell. Run a mid grey, #808080, through both readings and the difference comes out at ΔE00 0.01, which is nothing at all. The same test on a logo red returns 3.67. Saturation drives the whole symptom, so a grey backdrop sits still while the product in front of it drifts.
The Mac fix that’s already installed
ColorSync Utility ships with macOS and converts profiles for free, no download involved. Open the file, then work the pop-up menus along the bottom of the window:
- First menu, bottom left: choose Match to Profile.
- Second menu: choose sRGB.
- Third menu, bottom right: choose an intent, such as perceptual or colorimetric.
- Click Apply, then save.
The menu you must not confuse is the first one. Apple’s guide separates the two operations plainly: Match to Profile “changes image colors by modifying pixels to align with a new ColorSync profile”, while Assign Profile “keeps pixels unchanged but reassigns the ColorSync profile metadata to the image”. Assign sRGB to a wide-gamut photo and you have written the washed-out version into the file permanently.
Then the honest limits. It runs on macOS only, opens one file at a time, and the four unlabeled menus are the reason most people never touch it twice. Apple documents the conversion in that Mac app and nowhere on the phone, which is where the file usually starts, so a phone-only workflow has nowhere native to go for this. If the phone is where you work, you can still shrink the file on the phone and fix the color later. On a laptop or a phone, RoundCut Compress re-encodes the file without installing anything, and the picture never leaves the device while it happens.
Seven colors, two readings
Each row below is one color, written as the code values a wide-gamut file would store. Column two is what the file holds. Column three is what those values should become in sRGB. Column four is what you lose by uploading without converting.
| Subject color | Stored (P3) | Correct sRGB | ΔE00 if the tag is dropped |
|---|---|---|---|
| Logo red | #D93B2B | #EC2319 | 3.67 |
| Foliage green | #569E3E | #36A02B | 3.57 |
| Denim blue | #2C5494 | #1B5599 | 2.13 |
| Mid skin tone | #D6A382 | #DFA07C | 2.79 |
| Amber packaging | #EE9624 | #FD9100 | 4.38 |
| Teal accent | #209C9E | #009F9F | 4.11 |
| Neutral grey | #808080 | #808080 | 0.01 |
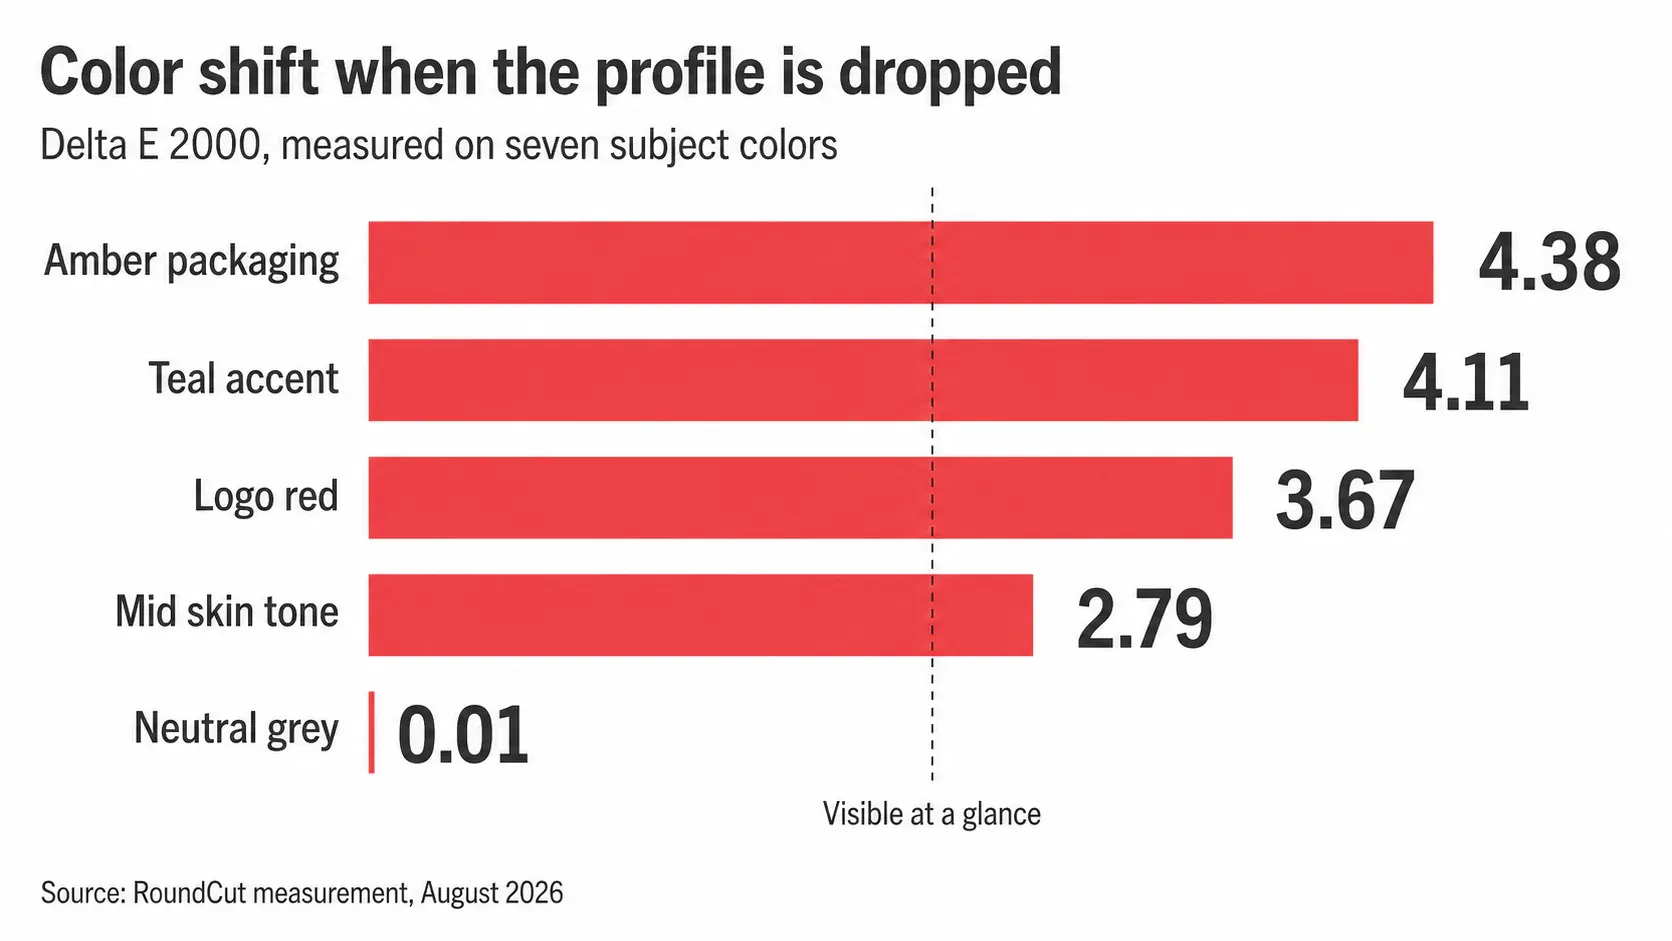
ViewSonic’s Delta E reference puts anything at or under 1.0 below the threshold of vision and calls 2 to 10 “perceptible at a glance”. Six of these seven colors land in that band. The skin tone at 2.79 is the one that matters for avatars, and Apple’s iPhone X launch page lists wide color capture on the front camera, the one that takes profile pictures, and the amber at 4.38 is the one that will get a client email about the packaging looking off (which is how most people find out this problem exists).
Saturation is the better way to feel it. That logo red reads as 69.6% saturation when the tag is gone and 84.7% after a correct conversion, a fifteen-point drop in the number a color picker shows you. Foliage green falls from 57.6% to 43.6%. If your brand book specifies a hex and your listing photos are supposed to match it, this is the step that quietly breaks the match, the same way an off-white background breaks a marketplace check on pure white product backgrounds.
Whole photos move more than a swatch chart suggests. I ran every pixel of a strawberry photo through both readings: 61.5% of pixels shifted past ΔE00 1, 52.7% past 2, and the worst pixel reached 6.14. A tomato photo behaved the same way, with 45.1% of its pixels falling outside sRGB entirely.
Where the tag dies
The camera rarely loses the profile. An export step does. I tagged a JPEG, pushed it through the operations a photo normally meets on its way out, and checked what came out the other end.
| Step | Output size | Tag survives |
|---|---|---|
| Saved with the tag (baseline) | 241,009 bytes | yes |
| Saved with no profile (control) | 240,455 bytes | no |
| ImageMagick re-encode at quality 82 | 196,988 bytes | yes |
| ImageMagick resize to 800px | 121,641 bytes | yes |
ImageMagick -strip | 235,299 bytes | no |
| Export to PNG | 1,355,305 bytes | yes |
| Script resize, default save | 90,383 bytes | no |
| Script resize, profile passed through | 90,937 bytes | yes |
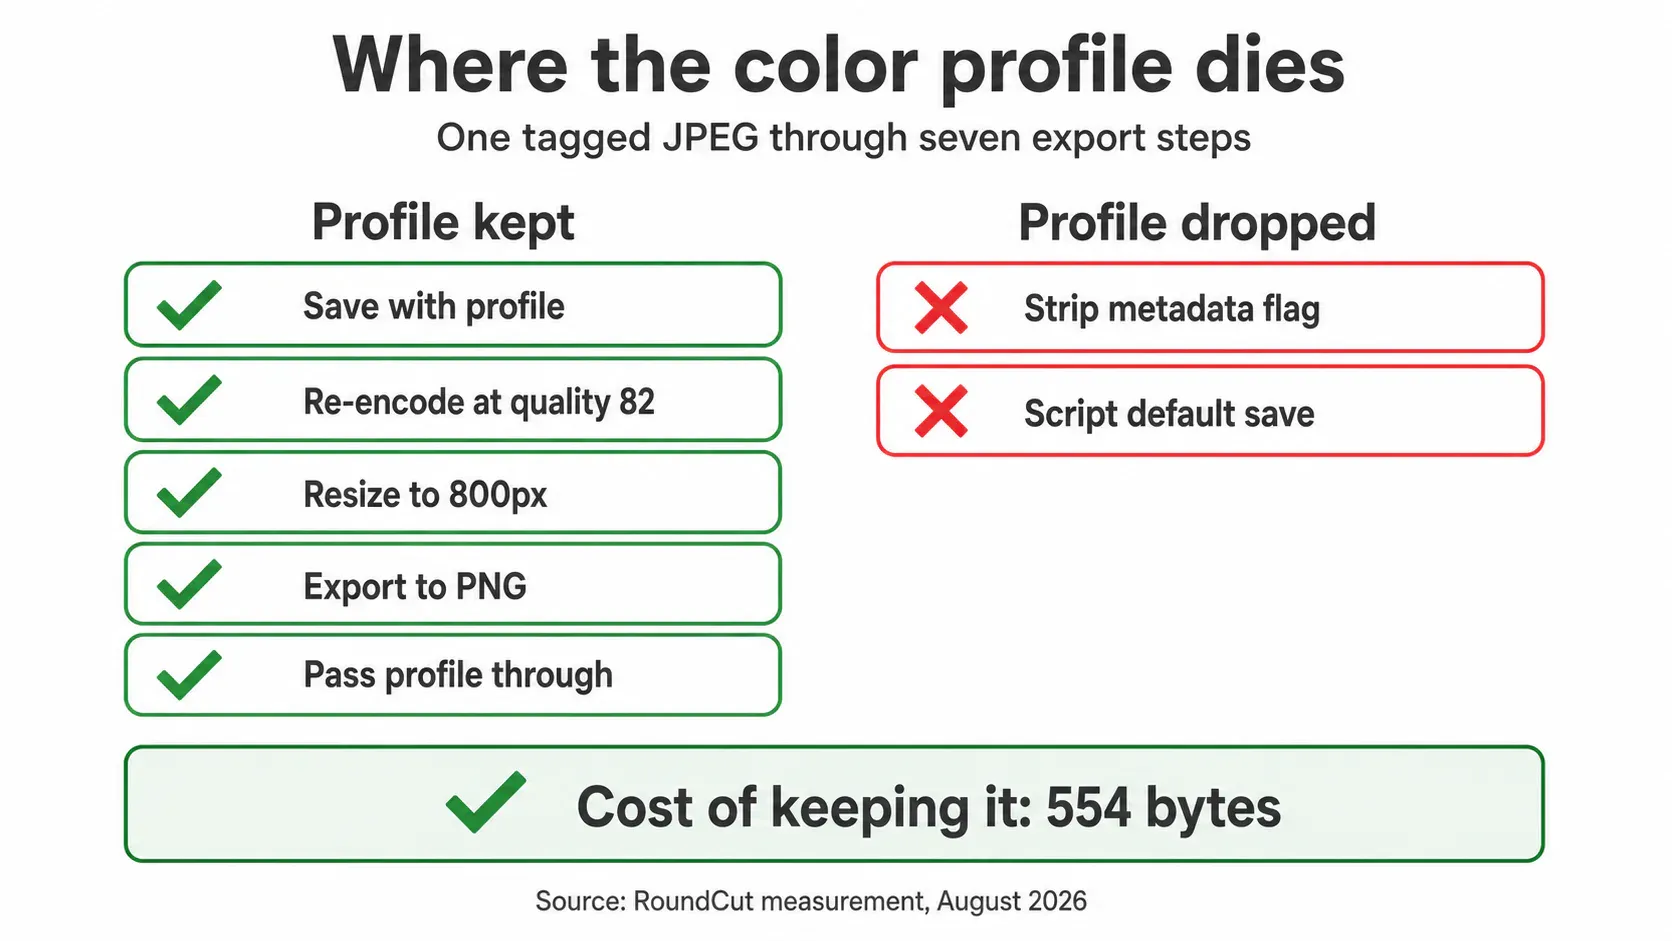
The two failures are the interesting ones, and neither announces itself. -strip is the flag half the optimization guides on the web recommend for shaving metadata, and it takes the color profile out along with the GPS coordinates and the camera model. The scripted resize is worse: the default save in most imaging libraries writes no profile unless you hand it one explicitly, so a batch job that resizes a catalog silently un-tags the whole catalog (which nobody notices until the listings look flat). Watch for it whenever you resize before you compress, because that is the exact stage where a profile goes missing.
Carrying the profile costs 554 bytes inside a 241 KB JPEG, roughly 0.2% of the file. Re-encoding that same file at quality 82 gave back 44,021 bytes, so the colors stay declared for a bit over one percent of what a single pass with modern JPEG encoders saves you.
What a correct conversion costs
Converting is not free, and the guides that say “just convert to sRGB, no loss” are selling you a rounding error as a certainty. For colors that fit inside sRGB, the conversion is nearly perfect: my four in-gamut patches came back at ΔE00 0.05, 0.06, 0.10 and 0.12, far under anything an eye can catch. For colors that don’t fit, sRGB has no room to put them. Amber lands at 3.24 after conversion and teal at 3.07, because both get clipped at the edge of the smaller gamut.
So the real comparison is 3.24 against 4.38 on the saturated colors, and 0.05 against 3.67 on everything else. Convert anyway. The gain is small at the top of the saturation range and enormous across the rest of the frame, and the converted file behaves identically everywhere instead of depending on whether the next system in the chain reads profiles. The one case for keeping the wide-gamut original is an archive copy: keep the P3 master, upload the sRGB derivative, the same discipline that keeps a full-resolution headshot on disk while you profile photos at 400 pixels.
Why re-encoding in a browser fixes it
Every browser image tool draws your file into a 2D canvas, and MDN documents the default plainly: a canvas rendering context is sRGB unless the code asks for something else. The conversion happens on the way in, at decode time, before any compression setting is applied.
I checked rather than assumed. I served a tagged patch strip to headless Chrome and read the pixels back with getImageData. The logo red went in as 217, 59, 43 and came back as 236, 35, 25. Skin came back as 223, 160, 124. Every readback landed on the same conversion computed two other ways: exactly, to the code value, for colorimetry run from the published primaries, and within one code value on the worst patch for an ICC transform against the official 536-byte profile from the ICC’s own Display P3 registry entry. Three routes, one answer. The untagged control strip came back with its numbers untouched, which proves the tag is what drives the conversion.
That’s why re-encoding fixes the file: the browser bakes the correct sRGB values into the pixels, so the result no longer needs a profile to look right. Change format with RoundCut Convert and the same decode path runs. Crop an avatar in the circle crop and it runs there too, which is a reasonable order of work when the photo is going to a platform that masks it into a circle anyway.
Checking a file you already uploaded
Download your own image back from the platform and open it next to the original. Pick one flat, saturated area, a jacket, a logo plate, a painted wall, and read the hex at the same spot in both files. Identical hex values with a different look on screen means the profile is the variable. Different hex values mean a conversion already happened somewhere, and the file is fine.
The grey check is faster. If neutrals match between the two files and only the saturated areas disagree, you’re looking at a profile problem rather than a compression problem, because compression damages edges and gradients long before it touches a flat grey. When the answer is a profile problem, convert, then resize image and re-upload at the size the platform actually renders.
One catch worth knowing before you spend an afternoon on this: on an ordinary sRGB monitor you can’t see the difference you’re correcting. Both versions look the same there, and the shift only appears on the wide-gamut screens that show the full P3 range, which includes the phone that took the picture. Verify on that phone, not on the desktop where you did the work.


