Image Blurry After Resizing? I Measured Four Filters
Your image looks blurry after resizing because a 4x reduction drops 15 of every 16 pixels. I measured four filters, the browser canvas, and the real fix.

Contents
Your image looks soft after resizing because shrinking is subtraction. Going from 1600 px to 400 px wide throws away 15 of every 16 pixels, and nothing gets that back. The filter you pick moves edge contrast by roughly 8 to 11 percent, which is real but small. The bigger lever is a light sharpen after the reduction, and only one setting genuinely wrecks the result.
Start with the resizer already on your machine
Apple’s Preview does honest resampling and it’s already installed. Open the image, choose Tools > Adjust Size, then type a width in pixels or switch the pop-up menu to percent. “Scale proportionally” keeps the other dimension in step, and the “Resample image” checkbox decides whether the app rewrites pixels or only changes the print resolution. For one screenshot before a Monday deadline, that’s the entire job.
What you don’t get is visibility. Apple’s guide never names the filter Preview uses, there is no sharpening pass after the reduction, and the app won’t show you two outputs side by side to compare. On a phone the gap widens, since the built-in editors are built around crop and straighten rather than an exact pixel width (I walked through the iOS detour in shrink iPhone photos).
When the number has to be exact and repeatable, resize an image in the browser instead. The arithmetic is the same, the file stays on your device, and you type the width yourself.
What a 4x reduction actually costs
1600 px down to 400 px is exactly 4x on each axis, so every output pixel stands in for a 4x4 block of the original. Sixteen pixels in, one out. You keep 6.25 percent of the data.
Two very different failures both get called “blurry”. The first is softening: the resizer averages each block, fine texture collapses into a mid-tone, and edges lose contrast. The second is aliasing, where the resizer samples one pixel instead of averaging the block, and the discarded pixels come back as a stair-stepped edge or a moiré pattern across anything with a repeating texture. ImageMagick’s filter documentation names both, calling out “staircase” effects from raw sampling and large-scale moiré on pixel-level patterns. They need opposite fixes, which is why generic advice to “use a better filter” helps roughly half the people who read it.
Four filters at 400 px, measured
I took three of our own images (a 1600x1000 screenshot of the RoundCut compress page, plus two 1600x900 blog heroes) and reduced each to 400 px wide in Pillow, the Python imaging library. Because the ratio is exactly 4, there is a correct answer to score against: the plain average of each 4x4 block. So each method gets two numbers. Error is how far it lands from that average, in 0-255 levels, lower being better. Edge contrast is how much gradient survived, higher being sharper. The table below is the screenshot, the one with the most fine detail at stake.
| Method | Error vs. correct answer | Edge contrast | JPEG q85 |
|---|---|---|---|
| Nearest neighbour | 4.10 | 52.1 | 20.3 KB |
| Bilinear | 1.24 | 42.4 | 15.5 KB |
| Bicubic | 0.89 | 45.7 | 16.7 KB |
| Lanczos | 1.13 | 47.1 | 17.2 KB |
| Bilinear, two steps | 1.70 | 40.8 | 14.6 KB |
| Lanczos + light sharpen | 1.50 | 51.3 | 18.4 KB |
Nearest neighbour tops the sharpness column and loses everything else. That 52.1 is stair-step contrast rather than detail: it sits 4.10 levels from the correct answer while Lanczos sits at 1.13, and Pillow’s own documentation is blunt about the mechanism. NEAREST will “Pick one nearest pixel from the input image. Ignore all other input pixels.” The other three read every source pixel that contributes, which is why they cluster so tightly.
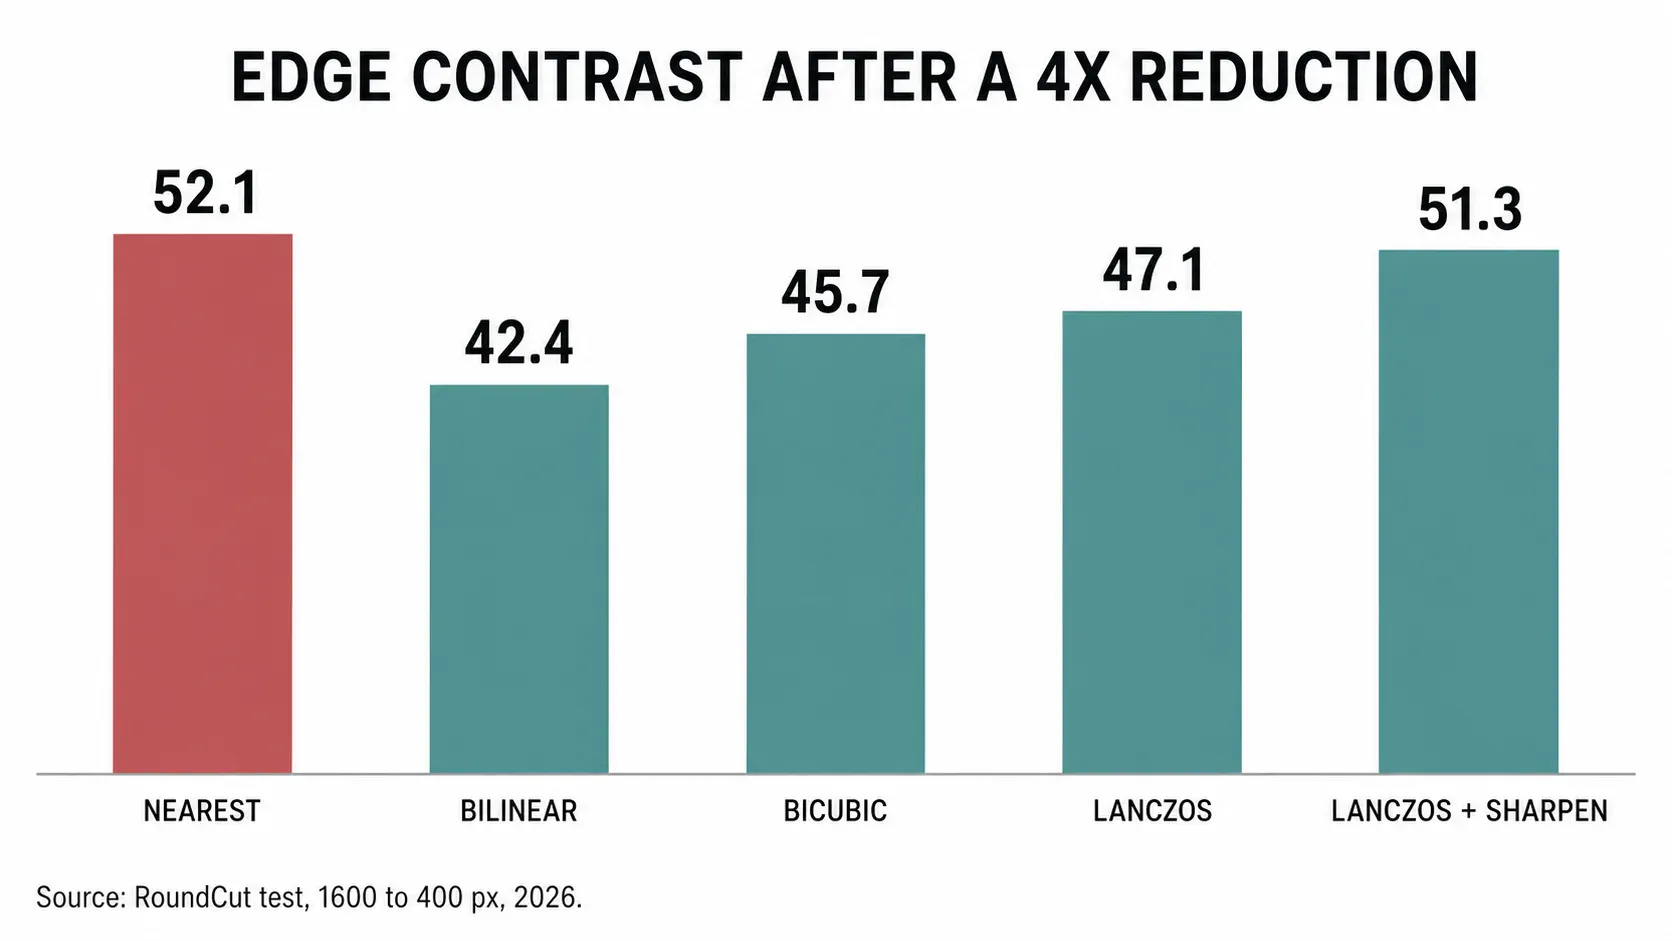
Between bilinear and Lanczos the gap held across all three test images: 11.2 percent more edge contrast on the screenshot, 8.2 and 9.7 percent on the two heroes. Worth switching when the panel is in front of you, not worth a second export. And notice the byte column, because a jagged edge is expensive to encode: nearest shipped 20.3 KB against 17.2 KB for Lanczos, 18 percent heavier for a worse picture.
What your browser does when it scales
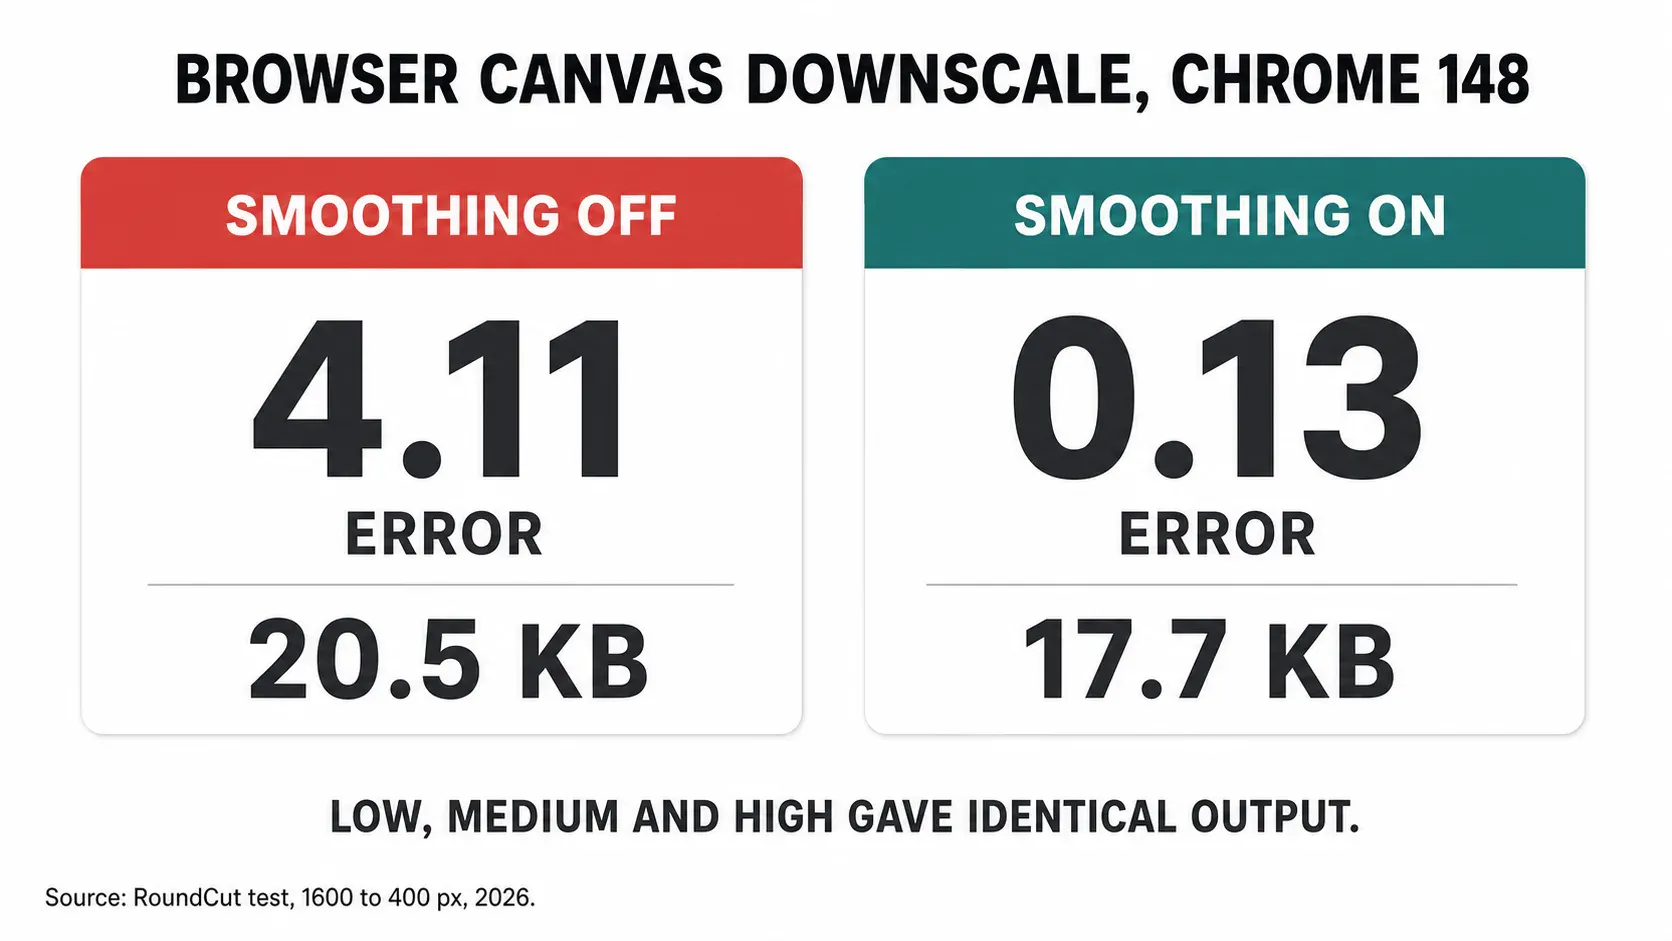
I expected the browser to be the villain here. It isn’t. I ran the same 1600x1000 to 400x250 reduction through a canvas in headless Chrome 148, scored against the identical 4x4 average, and the smoothed result landed 0.13 levels from the reference, closer than Pillow’s bilinear at 1.24.
The surprise sat in the quality knob. Canvas exposes imageSmoothingQuality with low, medium and high settings, and MDN spells out the default as "low" while flagging the property as “Limited availability” that “does not work in some of the most widely-used browsers”. In my run all three values returned byte-identical output: same 0.13 error, same 45.55 edge contrast, same 17,668-byte JPEG. Switching to high changed nothing at all.
Turning smoothing off is the setting that hurts, and it reproduced Pillow’s nearest neighbour almost exactly: 4.11 error against 4.10, 52.16 edge contrast against 52.12. Two unrelated harnesses landing on the same numbers is the closest thing to a control I had. It also cost 20,509 bytes against 17,668, that same 16 percent penalty for the staircase.
One caveat worth carrying: CSS scaling is a different path. When the page renders a 1600 px file inside a 400 px box, MDN describes the algorithm as user-agent dependent, and pixelated or crisp-edges explicitly select nearest neighbour. Lighthouse flags it once the rendered size is “at least 4KiB smaller than the actual size”, so shipping the big file and letting the layout shrink it costs bytes and control at once. Export at the display pixels you actually use.
The two-step reduction myth
You’ll still read that you should step down in halves, 1600 to 800 to 400, because one big jump loses detail. I measured it. The two-step bilinear pass scored 40.8 edge contrast against 42.4 for the same filter in a single pass, and drifted further from the correct answer, 1.70 against 1.24. Each intermediate save is another round of averaging, so the softening compounds.
The advice wasn’t nonsense once. A resampler locked to a fixed 2x2 or 4x4 neighbourhood, which is still how Pillow describes its non-resize transforms, really does break down past a 2x jump, because most of the block never gets read. Resize paths grew out of that: the same docs describe them reading every pixel that contributes, so the window widens with the reduction factor. Halving your way down just adds rounding.
Sharpen after the reduction, not before
Here’s the position I’ll defend: filter choice is a rounding error next to whether you sharpen afterwards. A light unsharp mask on the Lanczos output (0.6 px radius, 60 percent, threshold 3) pushed edge contrast to 51.3, an 8.8 percent gain over Lanczos alone and more than the entire bilinear-to-Lanczos upgrade. It cost 1.2 KB.
Order matters, though. Sharpening the 1600 px original before the reduction accomplishes nothing, because the averaging step throws that added contrast straight back out, and ImageMagick’s docs list over-sharpening during a resize as its own artefact source. Radius is where people overshoot. I ran the same 400 px file at four radii and counted the pixels that jumped more than 25 levels away from the unsharpened version, which is roughly where a halo becomes visible: 0.21 percent at 0.6 px, 1.07 percent at 1 px, 2.91 percent at 2 px. Blown highlights climbed the same curve, from 0.90 percent of pixels to 5.87. Going from 0.6 px to 2 px buys 21 percent more edge contrast and fourteen times the halo.
The trade-off is honest and it points at bytes: every step up this table adds weight. Lanczos plus sharpen shipped 18.4 KB where plain bilinear shipped 15.5 KB, 19 percent more for a visibly crisper result. On a product grid with forty thumbnails that’s a decision, not a default.
The order I run
- Crop first. Dead space at the edges is pixels you pay to resample. Do it in whatever editor you already have open, or crop to exact pixels when a spec dictates the frame.
- Resize once, straight to the final width, with the best filter your tool offers. Skip the intermediate step.
- Sharpen lightly, radius under 1 px, and check the darkest edge in the image for a halo before you accept it.
- Compress last. RoundCut Compress or anything comparable, once the pixels are final, since re-encoding a sharpened file is where the artefacts stack. The free-tier caps I measured across the free compressors decide that choice more often than quality does.
That sequence is also why “resize first” beats hunting for a magic quality slider when you chase a file-size target, and why blurry screenshots usually trace back to the resize step rather than the compressor everyone blames.
None of this rescues a source that was already small. My whole test ran on 1600 px originals with real detail to spend; feed the same pipeline a 400 px image someone pulled off a chat thread and every filter in the table lands within noise of the others, because there’s nothing left to discard. At that point the job becomes enlarging a small photo, which is a different problem with worse odds. So before you spend an afternoon on resampling settings, go find the original file.


